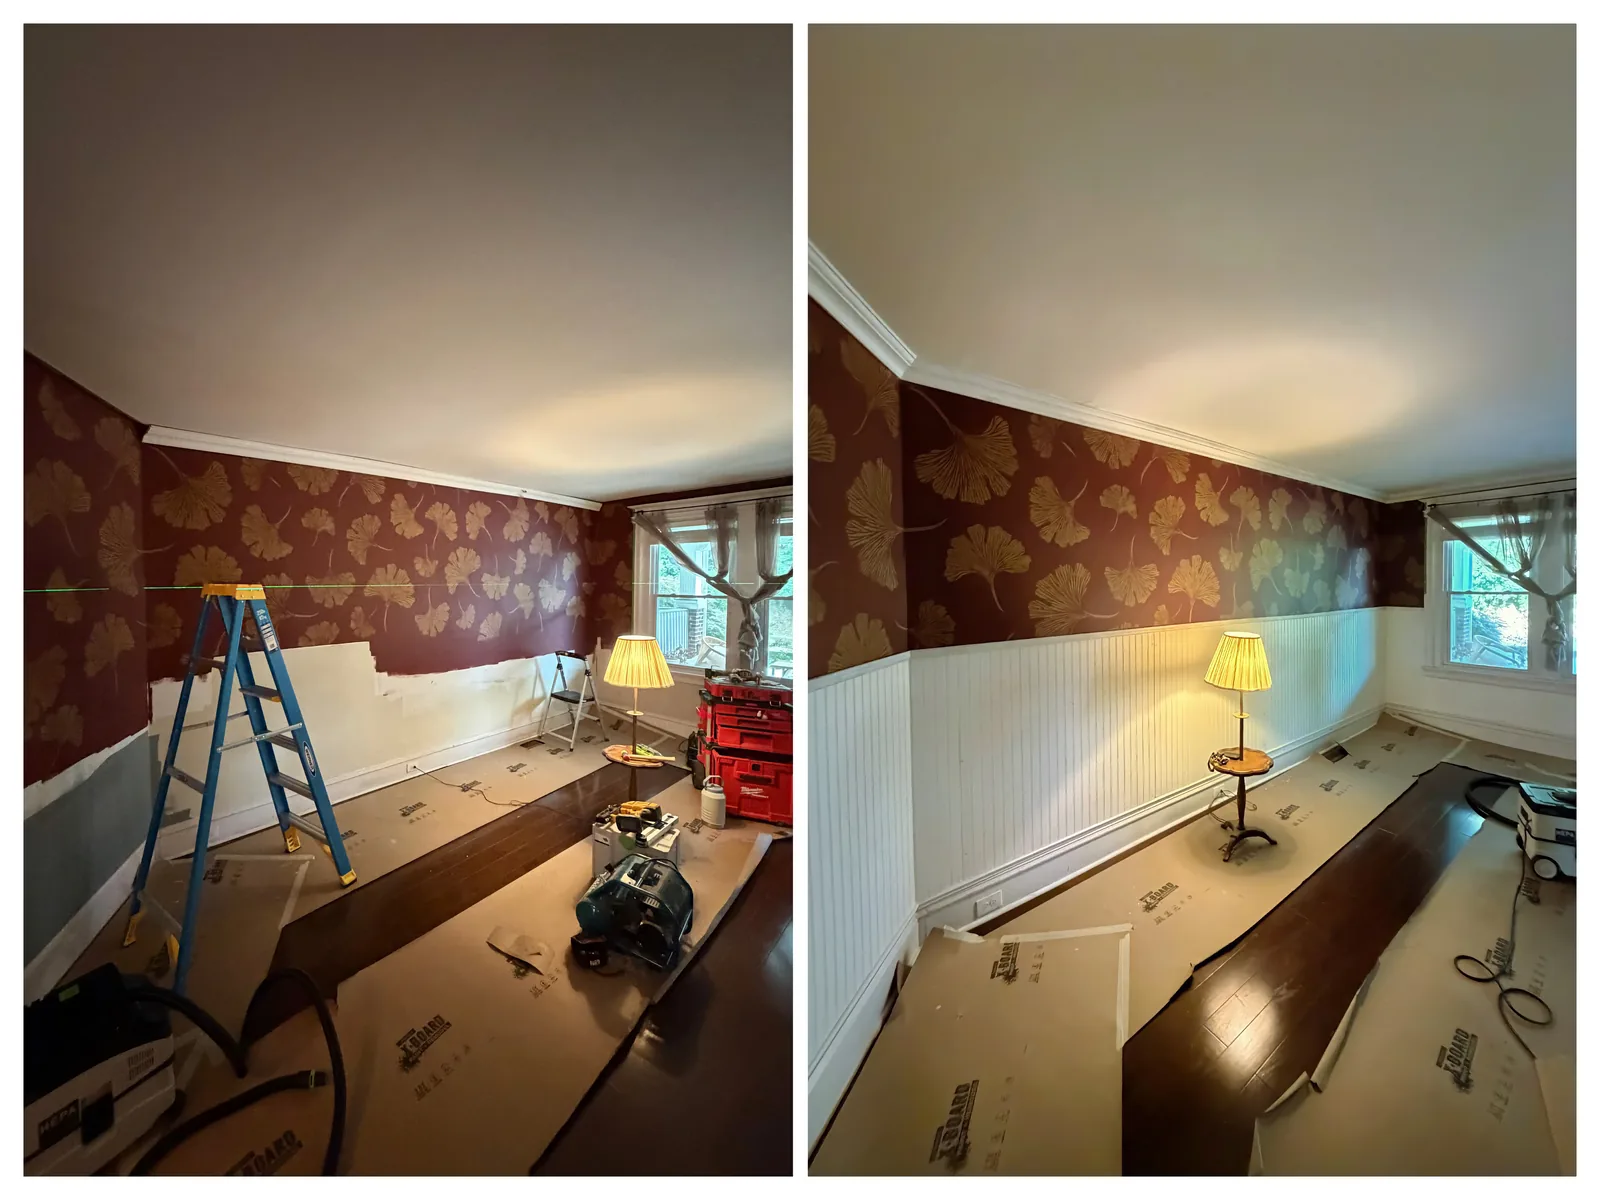
Before and after: new crown and beadboard worked into a 1930s row home so the old and new trim read as one
On Instagram, a carpentry project usually looks simple: a before photo, a few progress shots, and the finished room. What those photos rarely show is the problem-solving required to make the finished work look clean.
Two recent projects highlight this perfectly: a crown molding and beadboard installation in a 1930s Philadelphia row home, and a coffered ceiling in a house built in the 1980s. Despite fifty years separating them, neither gave us a single level, flat, or square surface to work with.
Integrating New Trim Into a 1930s Row Home
The Philadelphia row home had many of the conditions we expect in an older house: uneven plaster walls, dips in the ceiling and floors, and baseboards that had settled over time.
Our goal was to install new crown molding and beadboard while making everything feel like it belonged with the original trim.
Because of the ceiling dips, we could not simply push the crown tightly against the plaster. Doing so would have caused the molding to rise and fall visibly around the room. Instead, we established a consistent visual line and scribed the crown to fit the ceiling.
Scribing means transferring the shape of an uneven surface onto the trim and cutting it to match, so the crown follows the ceiling instead of leaving a wavy gap.
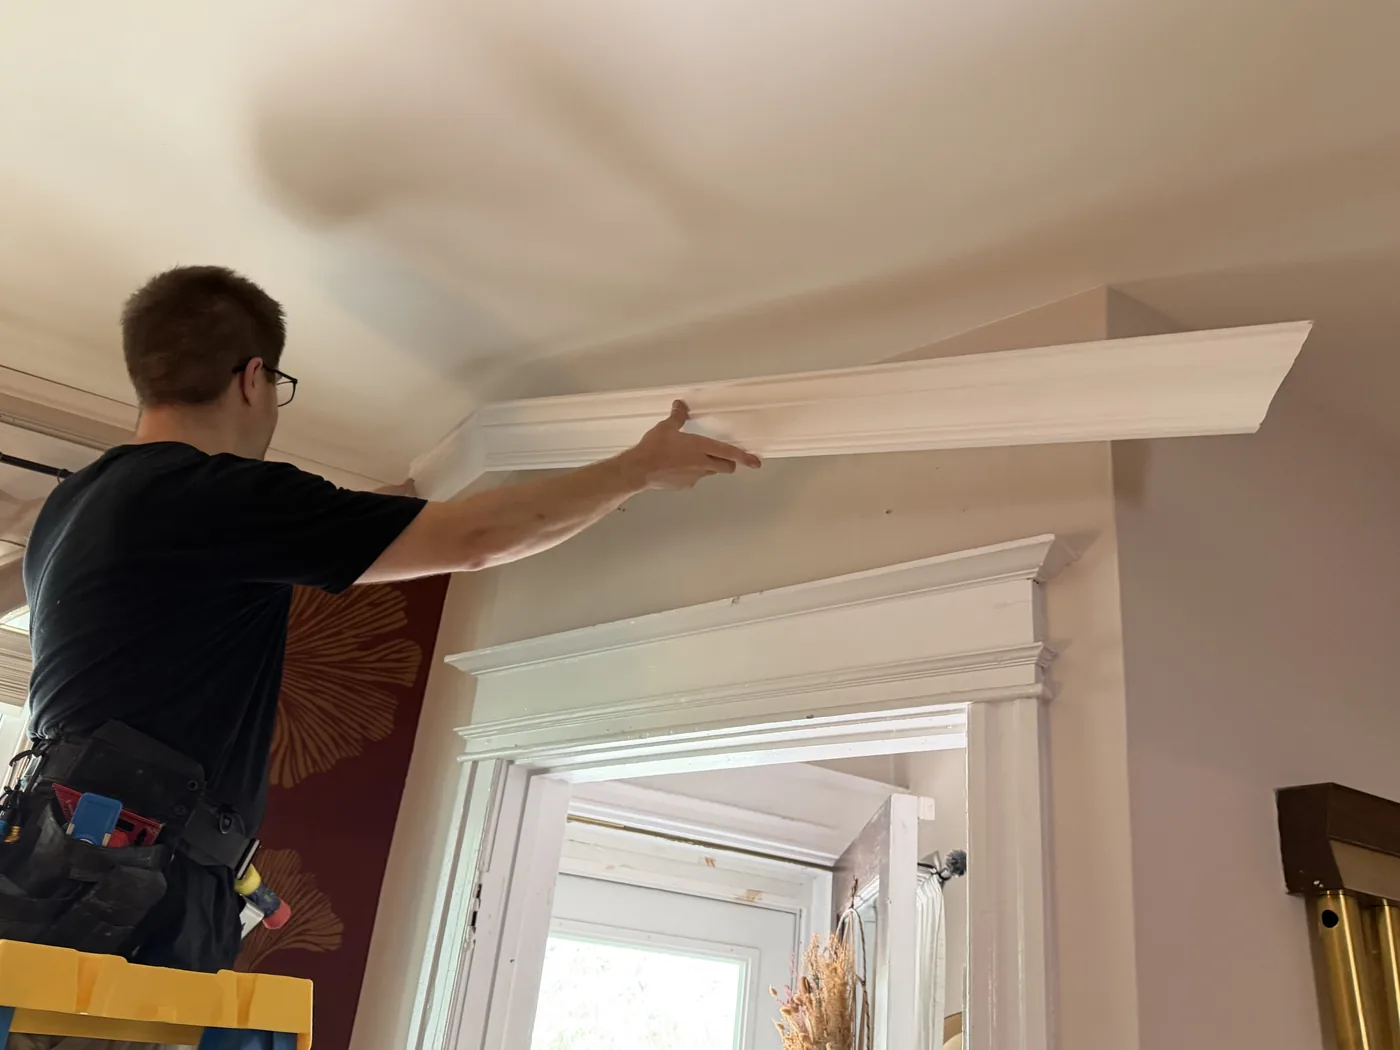
Installing a pre-assembled outside corner. Building the miter on the bench, rather than joining it in place, keeps the joint tight through years of seasonal movement
There is another detail in this kind of crown work that never makes it into a photo: the outside corners. Rather than cutting and joining the miter up on the wall, we assemble the outside corner first, gluing the joint together before it goes up. A corner built this way holds together far better over the years, because the joint is not relying on a nail and a bead of caulk to stay closed as the wood moves through the seasons. It is a small step that pays off long after the job is done.
We faced a similar issue with the beadboard. It was installed above the original baseboards, which were no longer level. Setting the panels directly on top would have transferred those variations right up to the top cap. To fix this, we kept our top line consistent and scribed the bottom of each panel to the existing baseboard.
The new beadboard also had to meet the original window casing. Portions of the window trim, including the stool and apron area, were damaged and had to be carefully removed, repaired, and reinstalled to align with the new paneling.
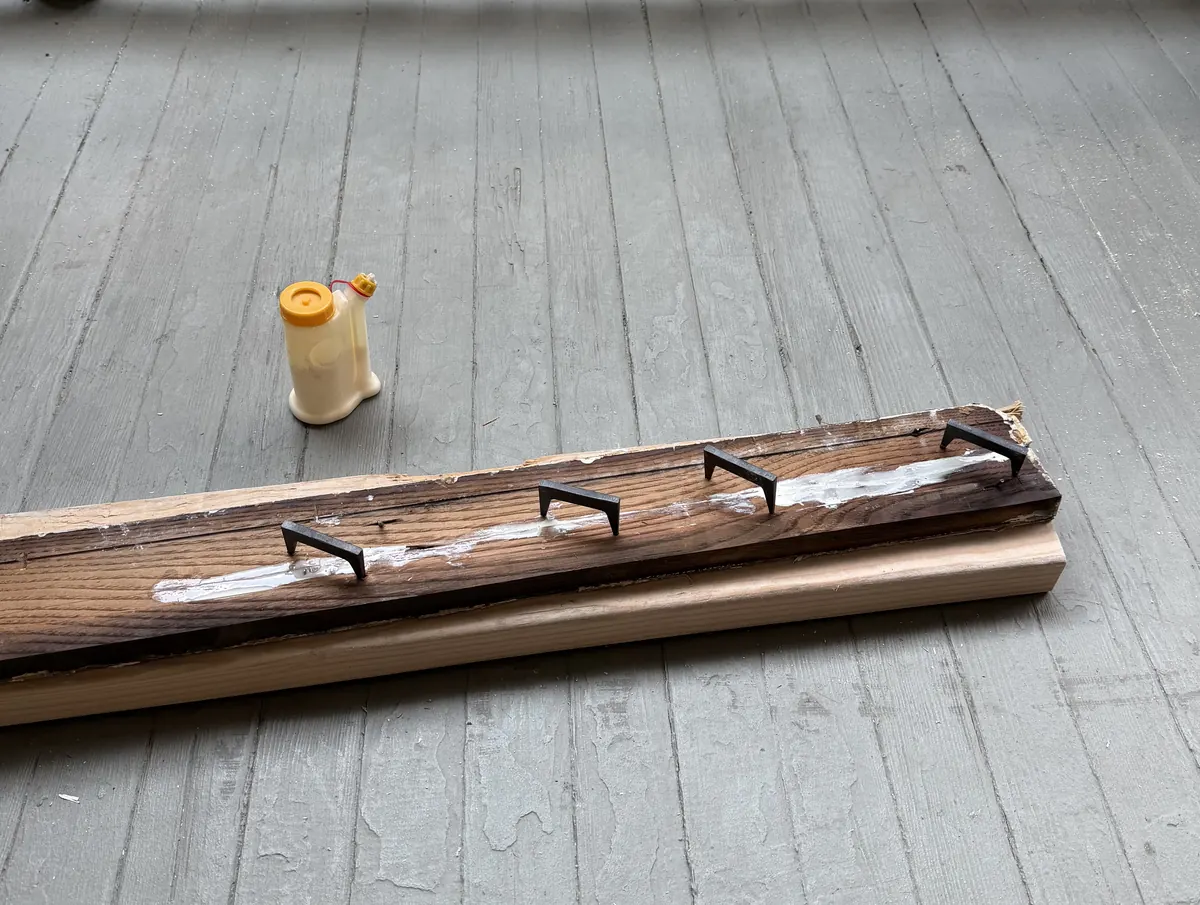
The original window trim had split along the grain after decades of settling. We glued and clamped it before putting it back on the wall
None of these adjustments stand out in the finished room, and that is the point. The new trim looks natural because it was fitted to the house rather than installed as though the house were perfectly straight.
When Scribing Is Not Enough
The coffered ceiling presented a completely different problem. Although the house was built in the 1980s, the existing drywall ceiling sagged and varied by approximately three inches across the room.
A three-inch dip across a bare room might go unnoticed, but the moment you install a dead-straight beam, the human eye immediately picks up the wave. Our beam design included crown molding, inverted baseboard, and a bottom 1x6. The spacing, or reveals, between these components needed to remain completely consistent throughout the entire ceiling grid.
A three-inch variation was far too severe to correct by scribing alone. Installing the beams directly against the existing ceiling would have produced inconsistent molding reveals, uneven beam bottoms, and a grid that visibly warped from one side of the room to the other.
The only practical solution was to create a brand-new level ceiling plane. Before any decorative work began, we:
- Installed wood strapping across the ceiling
- Individually shimmed every attachment point to eliminate the three-inch variation
- Hung new drywall over the level frame
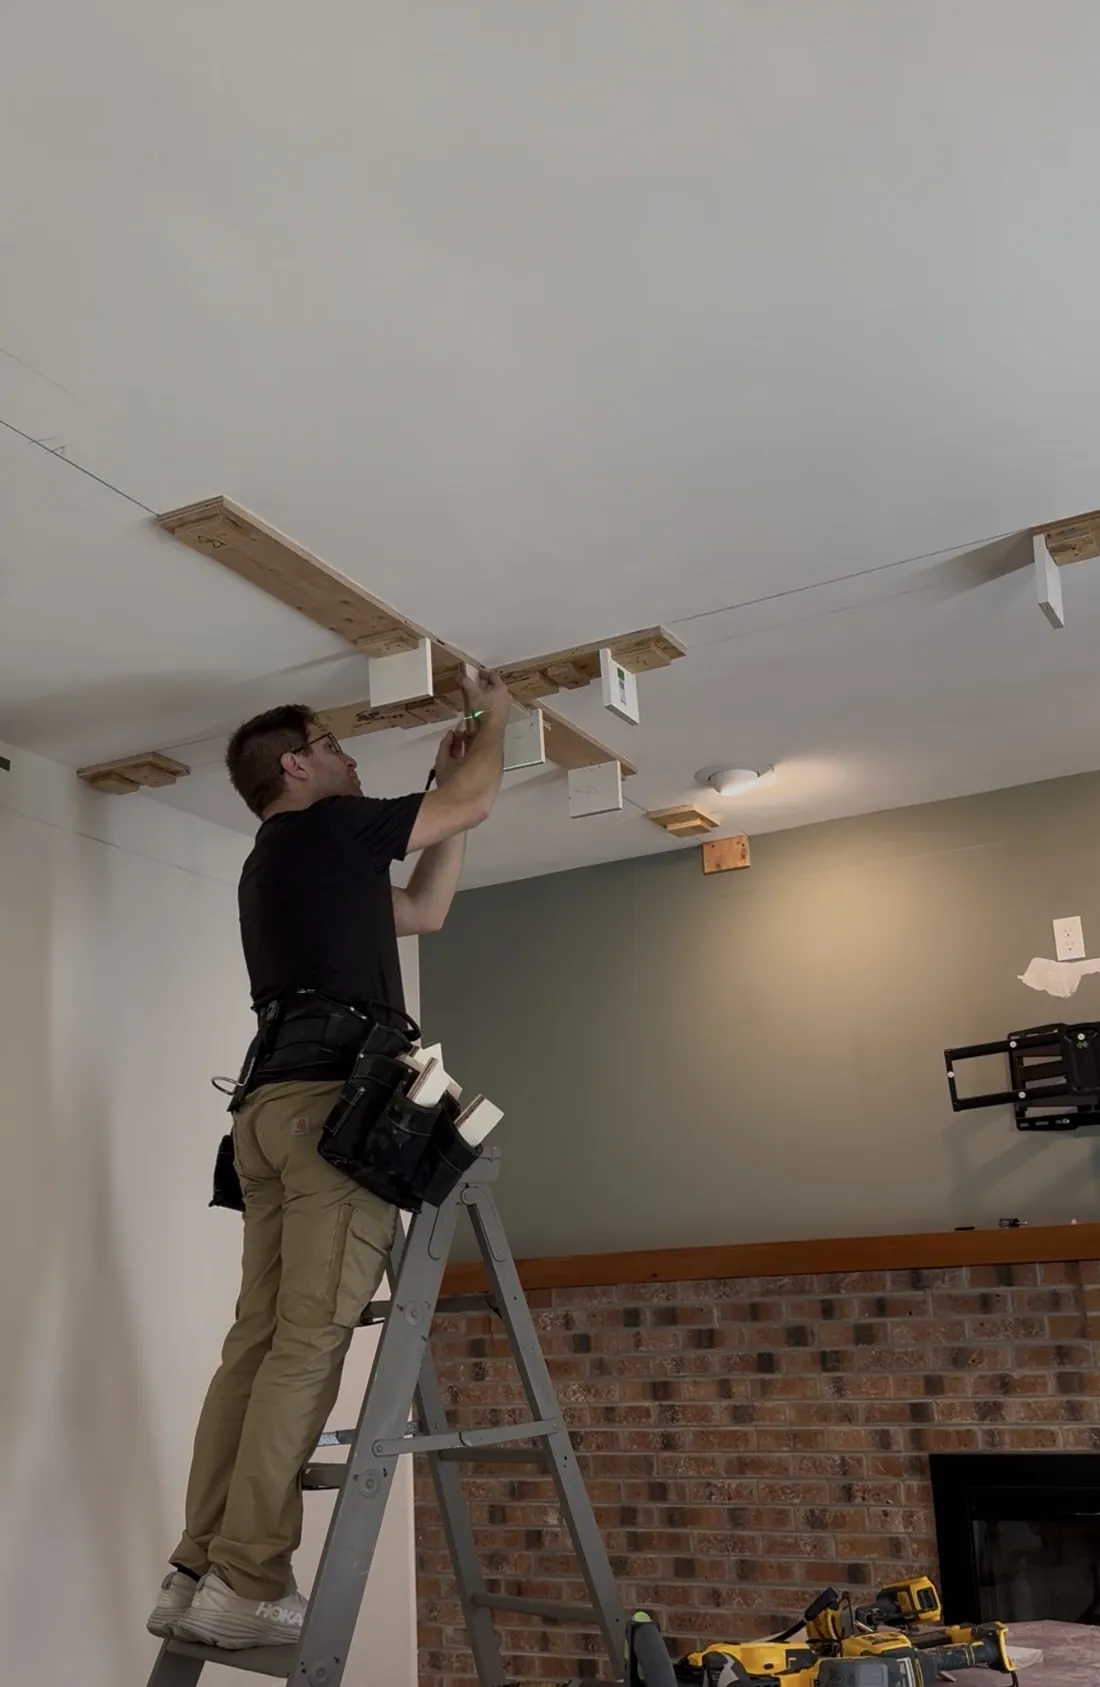
Each ceiling block was marked, cut and installed to establish a level plane for the bottoms of the coffered ceiling beams
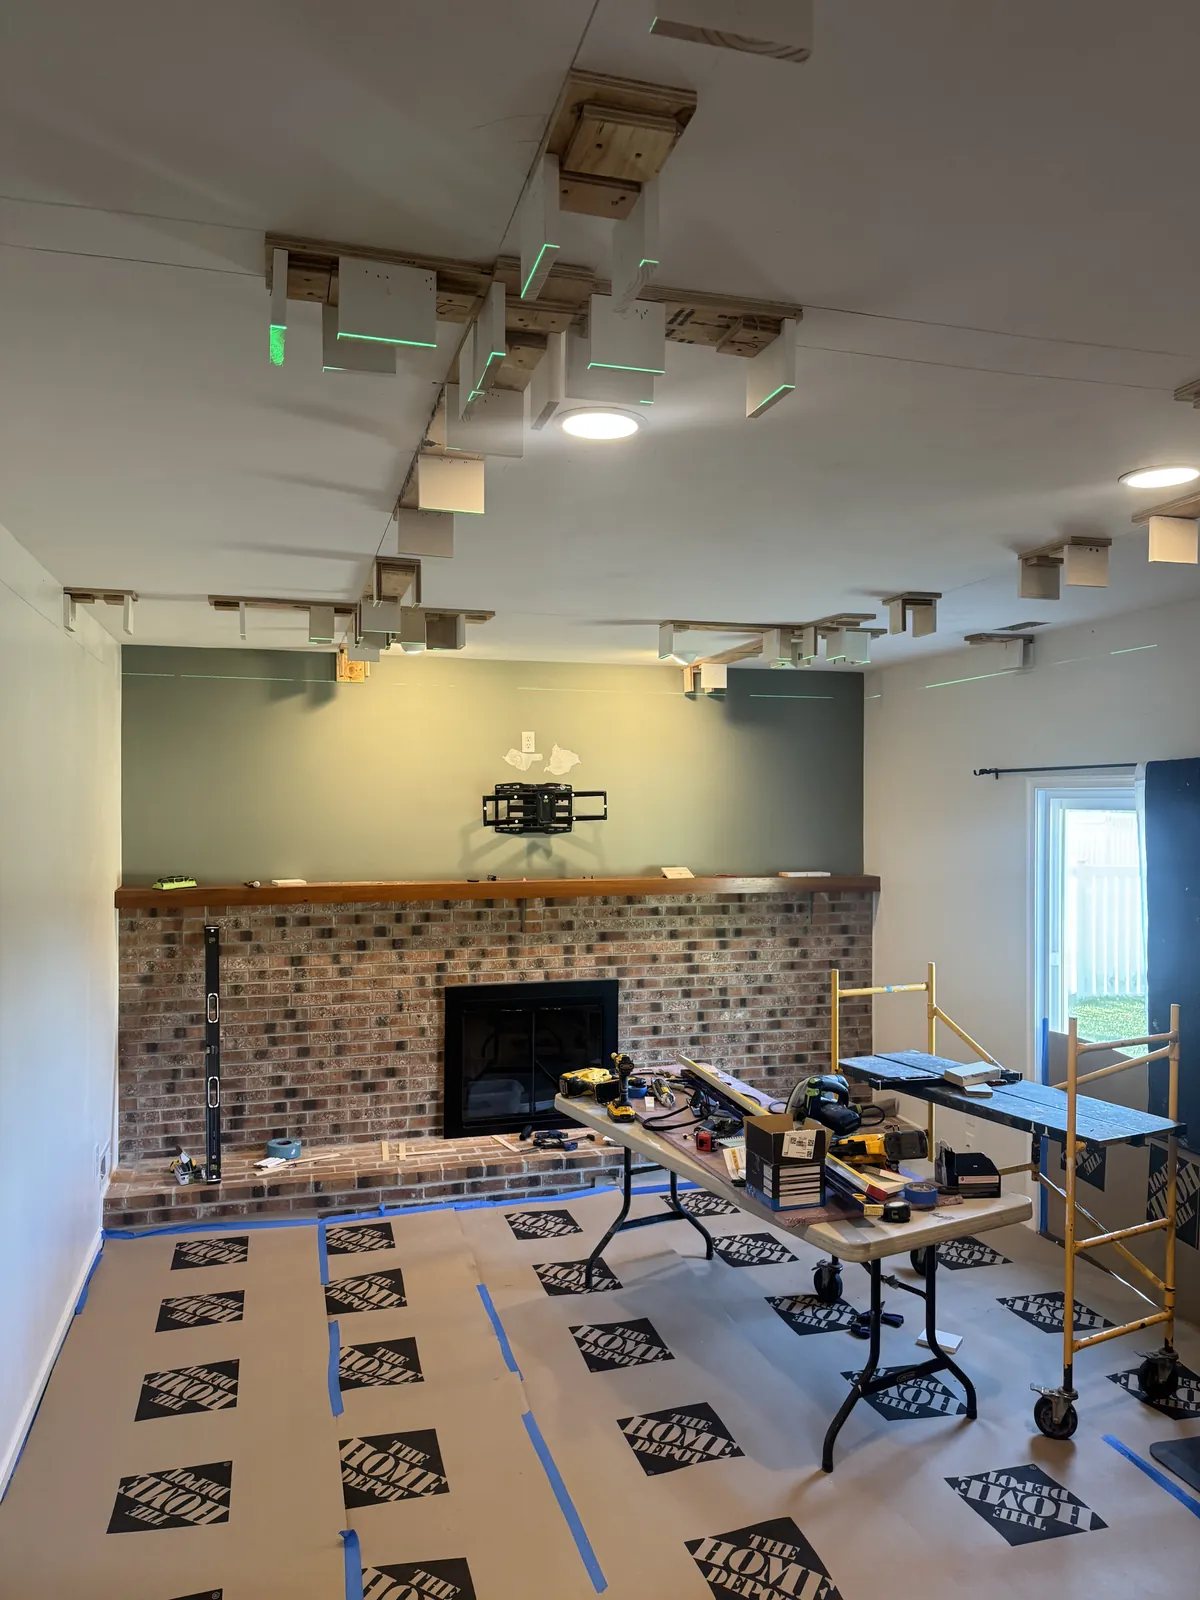
The same room during construction, with the full plane of blocks set to the laser before the finished beams go on
Once the underlying surface was true, we could lay out and build the coffers with straight beams and consistent reveals.
Each beam was built up from crown molding, an inverted baseboard, and a bottom 1x6. Getting the first beam set correctly is what sets the reference for the entire grid, so every beam after it lands with the same spacing and the same reveals.
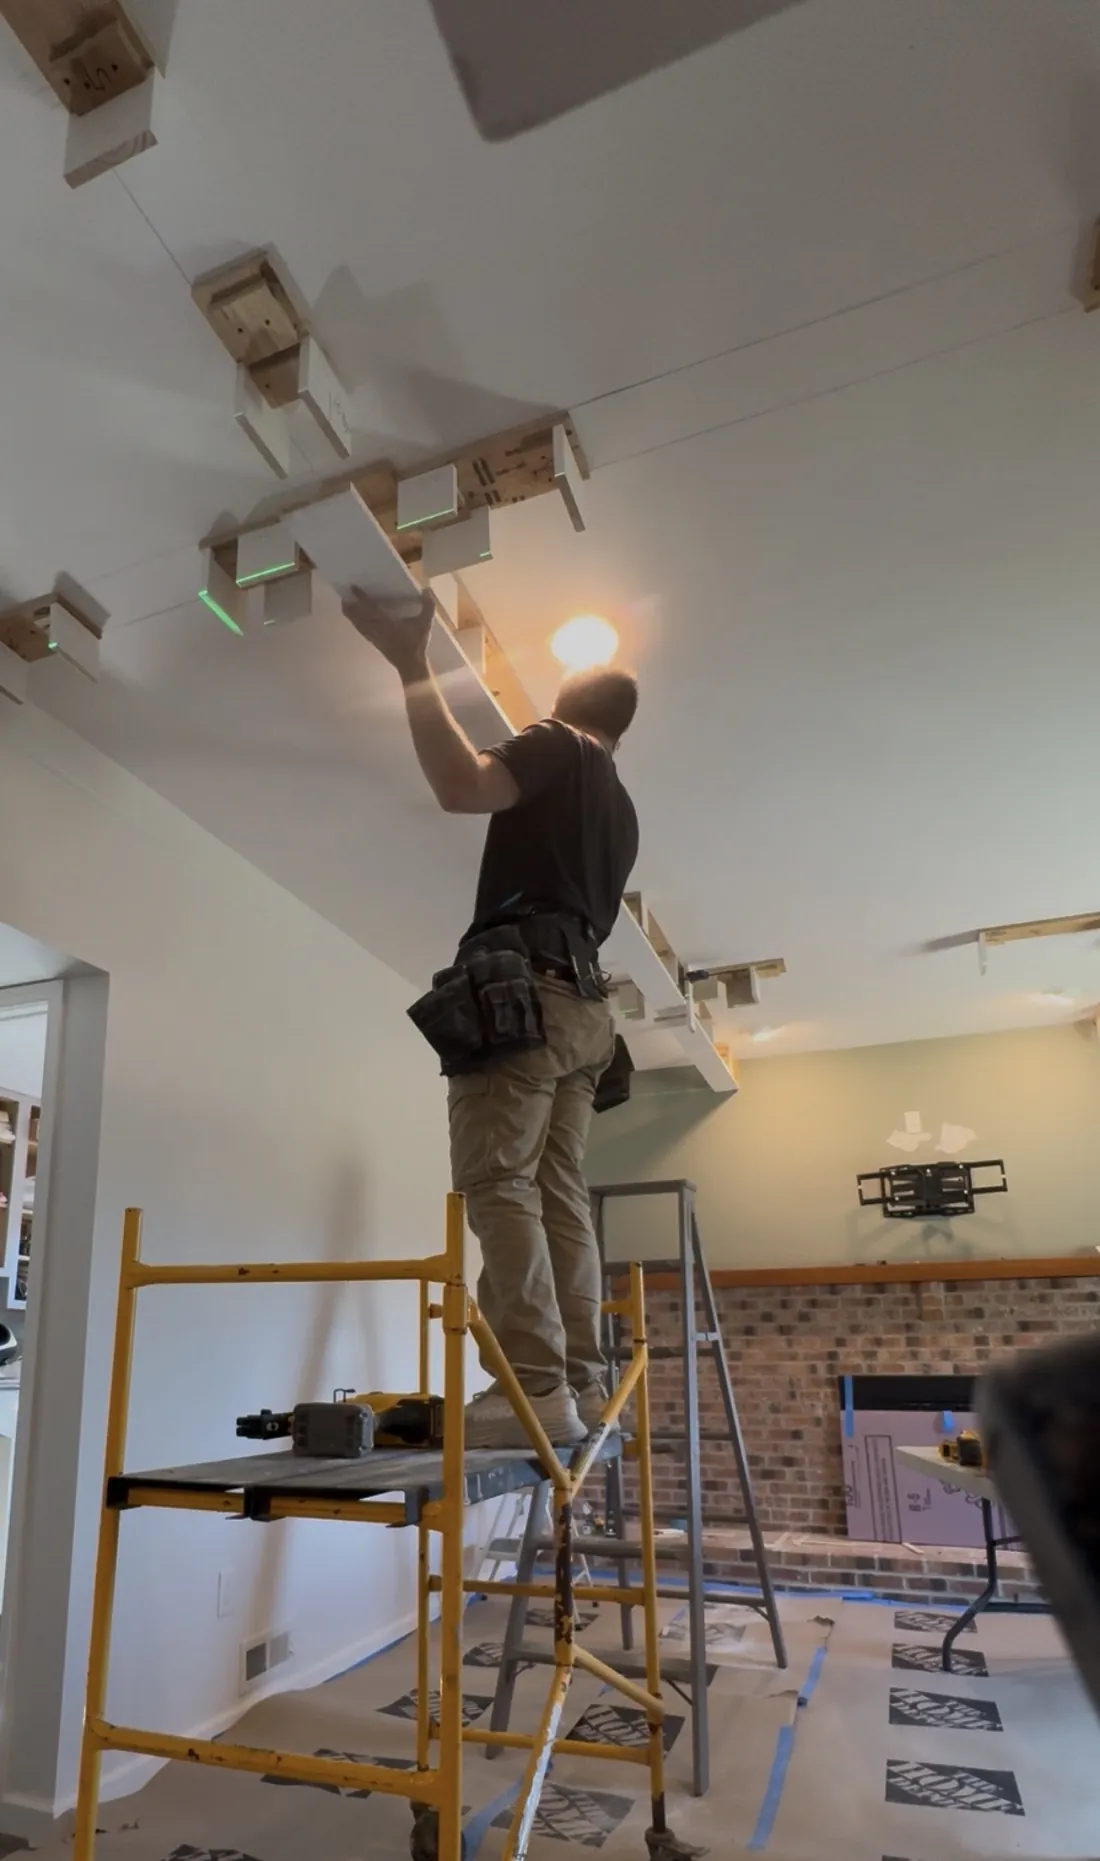
Setting the first beam as the reference for the rest of the grid
The bottom of every beam also got a detail that is easy to miss: a one-eighth-inch roundover routed along each edge of the 1x6. That small eased edge softens the hard corner, catches light cleanly, and gives the beams a finished, built-in look instead of a boxed-in one. Every beam bottom in the room got the same treatment so the detail stays consistent across the whole ceiling.
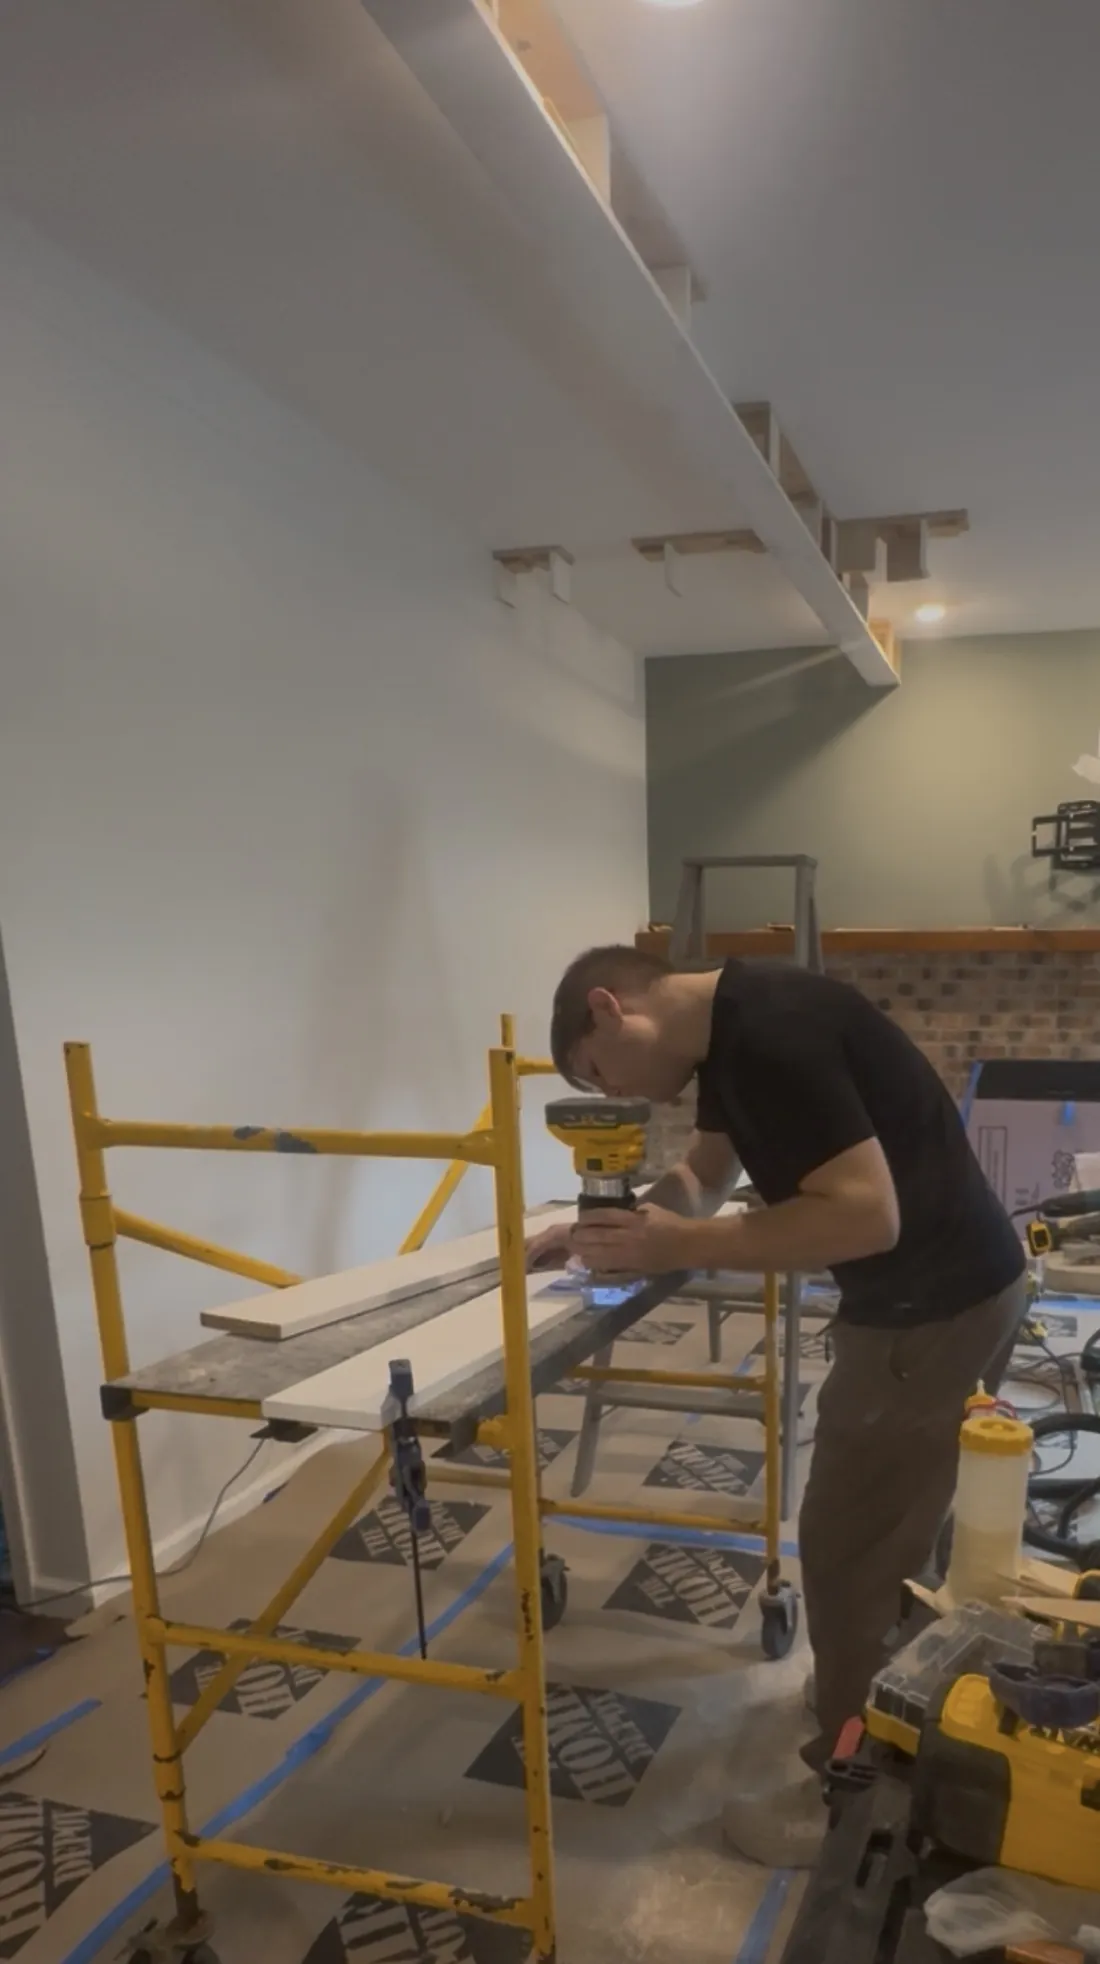
Routing a one-eighth-inch roundover into each beam bottom, a small detail carried across every beam in the room
The design also required behind-the-scenes mechanical coordination. Recessed lighting locations had to be calculated to center within the future beam layout, and HVAC ducts had to be relocated so they did not conflict with the grid. These are details most people will not think about when looking at a finished room, but they have to be solved long before construction begins.
The Work You Do Not See
The final photographs show clean molding, straight lines, and beautiful finished spaces. They do not show the measuring, scribing, shimming, structural repairs, or mechanical coordination that made those results possible.
Good finish carpentry is not about forcing every house into perfect, theoretical dimensions. It is about recognizing where the new work should follow the existing structure, where micro-adjustments can be made, and when the underlying surface needs to be rebuilt first.
Sometimes that means scribing crown molding to an old plaster ceiling. Sometimes it means fitting every beadboard panel individually. Other times, as with the coffered ceiling, it means rebuilding the plane before the decorative work can even begin.
The finished project may be what gets posted on Instagram, but the unseen work behind it is what makes that final photo possible.
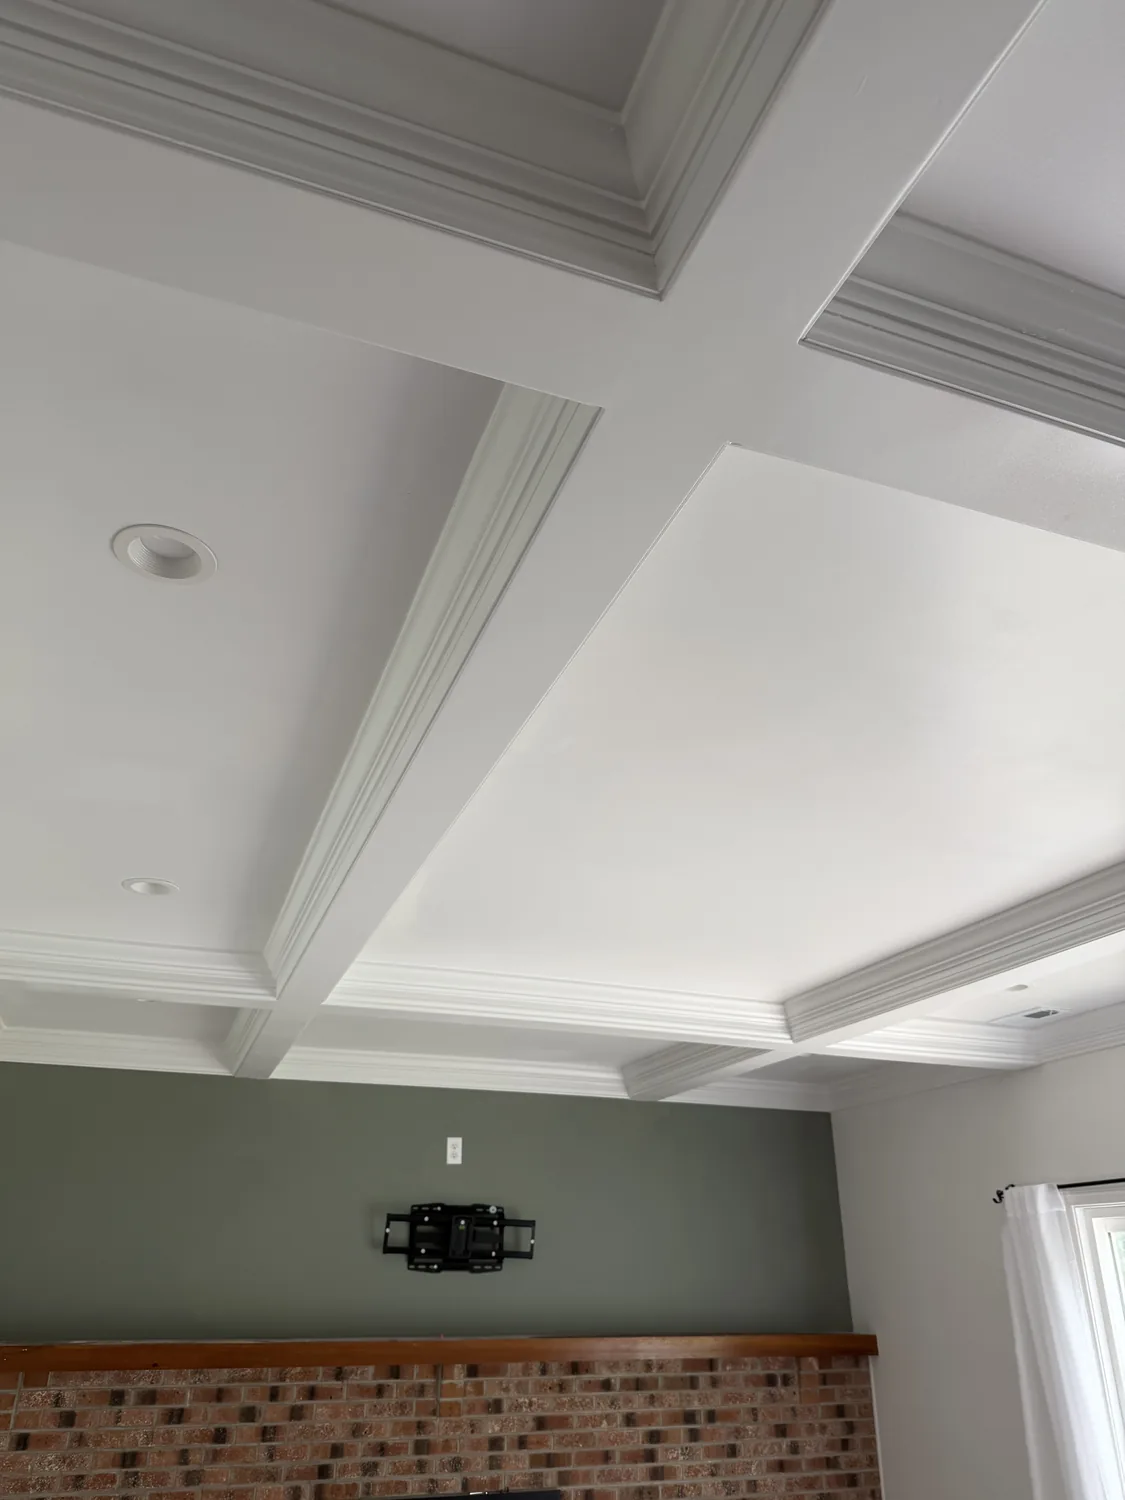
The finished coffered ceiling, built on a strapped and leveled plane hidden above the beams
Thinking About a Project Like This?
Free estimates directly with the owner, who works with you from the first measurement to the final walkthrough.
📞 Call 484-995-8599 💬 Text Photos of Your Space